HDR Image Development
(From the Photo Blog)
Today I saw an article on HDR images taken in Tokyo, along with some techniques that could be used for creating them. As I'm always interested in new ways of developing photos, I downloaded the Photomantix Software and installed it, and followed some simple instructions [1] [2].
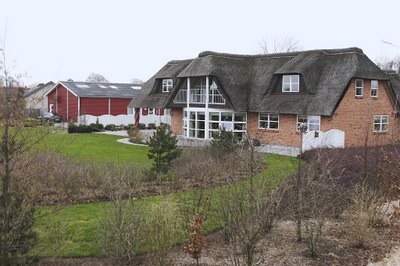
For test material I used the Auto Exposure Bracket on my 20D and took three shots of the same scene, with 2EV intervals. This is the scene, as it would ordinarily look from the camera:
 Creating the HDR image itself is very easy. The difficult part is to make it back into an ordinary image - the part called Tone Mapping. This is my first attempt:
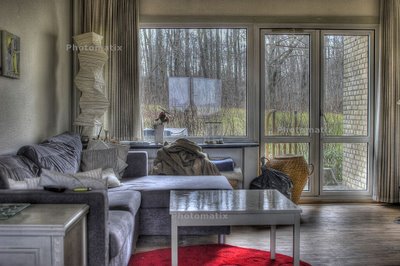
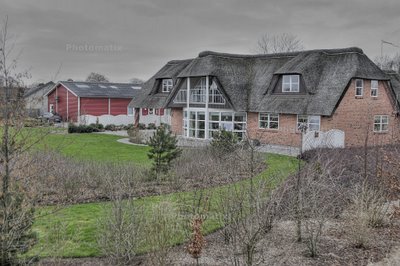
As you can see the basics work nicely, but it's a bit overdone, so with some parameter tweaking this is what we get:
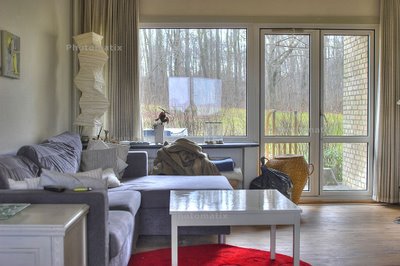
Tone mapping is of course the interesting part, since combining several shots with different exposure is pretty straightforward. The algorithm in photomatix has many possibilities for adjustments and even though their controls seem rather unintiutive you have an ok control over your final image.
Visually it evens out the light in the image. Adjusting parts of the image up, and other parts down. So you will very easy end up with a quite boring image, because shadow and light areas are getting less visible, removing characteristics of your shot.
You also run the risk of creating very unnatural light in your image. This is most easily seen when scaling down the image to a thumbnail view, where it looks as if parts of the image are inverted. If you look at the thumbnails of the images in the flickr HDR pool, you can see what I mean pretty fast. Looking at the fullsize images makes this a bit more difficult to spot.
So adjusting HDR Tone Mapping is not easy, and will take some time to master. But it is interesting and a good way of getting a sense of increased dynamic range into the photos.
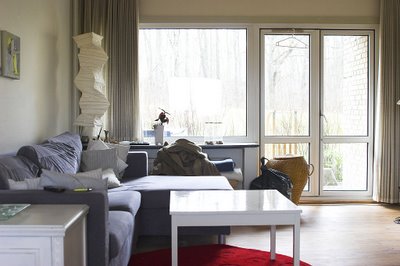
Here are two more examples. These have not been taken using Exposure Bracketing, but have instead been combined from three RAW exposures.
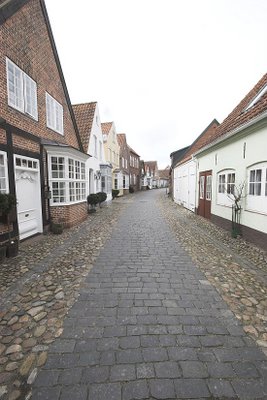
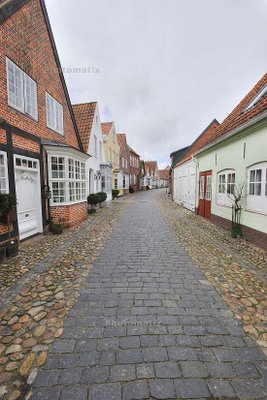
Here is an example of some of the dramatic effects that this can be the basis for. The resulting image isn't in itself that great, except it restores the sky. It does however make a very "flat" image - almost like a painting, as it removes most of the shadows from the image. The tone mapped image needs a bit more work before it's great, but the effect is interesting nonetheless.


Today I saw an article on HDR images taken in Tokyo, along with some techniques that could be used for creating them. As I'm always interested in new ways of developing photos, I downloaded the Photomantix Software and installed it, and followed some simple instructions [1] [2].
For test material I used the Auto Exposure Bracket on my 20D and took three shots of the same scene, with 2EV intervals. This is the scene, as it would ordinarily look from the camera:
 Creating the HDR image itself is very easy. The difficult part is to make it back into an ordinary image - the part called Tone Mapping. This is my first attempt:
As you can see the basics work nicely, but it's a bit overdone, so with some parameter tweaking this is what we get:

Tone mapping is of course the interesting part, since combining several shots with different exposure is pretty straightforward. The algorithm in photomatix has many possibilities for adjustments and even though their controls seem rather unintiutive you have an ok control over your final image.
Visually it evens out the light in the image. Adjusting parts of the image up, and other parts down. So you will very easy end up with a quite boring image, because shadow and light areas are getting less visible, removing characteristics of your shot.
You also run the risk of creating very unnatural light in your image. This is most easily seen when scaling down the image to a thumbnail view, where it looks as if parts of the image are inverted. If you look at the thumbnails of the images in the flickr HDR pool, you can see what I mean pretty fast. Looking at the fullsize images makes this a bit more difficult to spot.
So adjusting HDR Tone Mapping is not easy, and will take some time to master. But it is interesting and a good way of getting a sense of increased dynamic range into the photos.
Here are two more examples. These have not been taken using Exposure Bracketing, but have instead been combined from three RAW exposures.


Here is an example of some of the dramatic effects that this can be the basis for. The resulting image isn't in itself that great, except it restores the sky. It does however make a very "flat" image - almost like a painting, as it removes most of the shadows from the image. The tone mapped image needs a bit more work before it's great, but the effect is interesting nonetheless.
